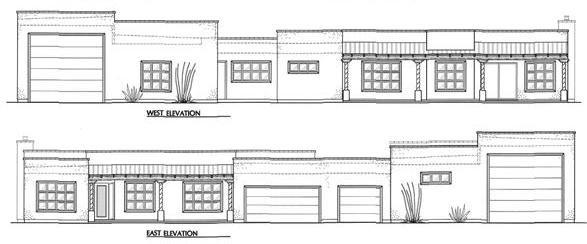
During the past 3 weeks the exterior painting was finished. There will be touch-ups of course, but this is it for now. We absolutely love it.
We had a landscaper in to take a look and design a landscaping plan which will include addressing rainwater issues and harvesting, hardscapes and what to plant. His name is Scott Calhoun. His company is Zona Gardens (
http://www.zonagardens.com/). Check out his portfolio at his website.
He recently won 1st Place in the Professional Residental Category of the 8th Annual Xeriscape Awards given by the AZ Department of Water Resources and the Tucson Botanical Gardens. We went to a couple of his classes and really like his style. He seems interested in working with our dramatically painted house, our natural open space requirements, the walled area we want to create and the transitions between all those.
Exterior Paint:So here are some recent pictures of the exterior of the house. This is the front porch.

This is one of the painters working on the north side of the shop. Don't try this at home.

This is the front of part of the garage and the shop.

This is the west side of the shop with a little of the courtyard peeking through the palo verdes.

This is the courtyard. At first I thought this was going to be a throwaway space since it has kind of an odd location. Now, largely due to the colors, it's my current favorite spot.

This is the back porch on the west side of the house.

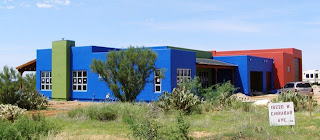
And this is what you see when you drive up these days.
Kitchen:
The kitchen is usually the most complicated and expensive part of the house. I'm sure ours is no exception. This is how the tile and rangehood developed over the past three weeks.

Here Kelly and Trout start attaching the drawer fronts.


And this is the way they look now.

This is the bar countertop not yet grouted.

Great Room:
There are a couple more great room detail pictures later, but this was a major accomplishment. This hearth isn't grouted yet, but it's exactly what we wanted.
 Laundry:
The laundry is my "shop." This is the where the sink will go.
 And here is Trout checking door instally gaps and adjusting the hinges.

Master Bath:
When I started working on this blog, I thought I had more pictures, but there's been so much activity in the master bath I haven't been able to get in to get very many good ones.
This is my vanity, but the grout hasn't been cleaned yet.

This is Trout's countertop laid out.

This is the shower, still not grouted in this picture.

And the same goes for this pebble shower floor. The pebbles are very similar to those on the hearth in the great room.
 Guest Bath:
This tile did get grouted. This is the mural at the back of the tub. Now I have to get busy and finish the shower curtain I'm making for it.

Most of the light fixtures were installed this weekend. This is the little baby fan for the guest bath whirring away.

This is what the vanity looks like. It's not attached and the sink isn't installed yet.

The vanity lights were installed, but they are going to need some changes. I wanted them just like this, but the bar across the top hangs down too low so the fixture needs to be turned with the lights pointing up. The sconces were made slightly differently from the picture I had of them. The difference is that the light part is about 3" higher, so they are going to need to be lowered or turned with the light pointing down if possible.

More Lighting:
I just had to have some on the house. There is a company here that does these plasma lazer things including light sconces. So these guys will flank our front door with lights in their bellies. One will point up and one will point down the wall. Both will face you as you arrive at the house.


You will also see the entry lights from outside since the door is glass. This is what they look like now from the inside. At first I thought these mulit-colored glass stars wouldn't provide enough light, but many of the glass panes are clear. I love the shadows they cast on the ceiling and walls.


In most houses these days there aren't any overhead lights. Frequently you flip a switch to activate a plug that turns on lamps. That's just not enough light for me. So we have sconces around the great room and dining room and in the hall to our master bath. When you get Talavera pieces from Mexico, you usually don't know what you will be getting. I think we lucked out. All the ones we got are great, but don't expect them to match.

In this picture you can see 2 of them lit as well as one of the fans in the great room. This house is defintely mix and match with some very contemporary stuff, some vintage stuff and lots of funky stuff. We chose a school house type globe for the light kits on the fans.
 Exterior Lighting:
Now for the real fun. These pictures are hot off the camera from last night. Trout and I got into it over the bulbs for these fixtures. I had purchased the lowest lumen and wattage compact fluorescent bulbs I could get for them both due to our lumen restrictions and for conservation (money being a big one) reasons. He still thought they were too bright. So I looked again and verified that this was the best we could do for outdoor bulbs.
You may remember that we chose these <$20 fixtures to replace the >$150 ones we originally picked. I'm sure glad we did. They not only were cheap but they look great.
This is the front of the guest room last night.
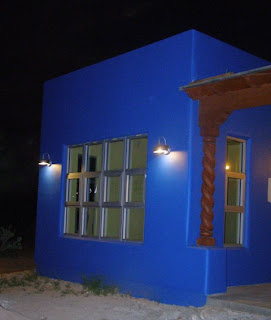
This is the front porch. Before I bought yellow bug compact fluorescents, I wanted to try regular yellow bug lights on the porches. Any yellow light has lower lumens, so I wanted to make sure we had enough light and that the yellow color didn't mess up the wall colors. I think they are fine and we will gradually replace them with the CFLs as they go out.

Now we're back to the regular white CFLs in front of the garage. The exterior lights are switched in a number of places inside so that they all don't turn on at the same time. We will need to label where the switches go. This was the hardest location to figure out.

I just love the way the light hits the walls, but I particularly love it on the Pomegranate shop. There is still plastic on the interior of these windows for some reason. It has some interior Baby Chick paint sprayed on it and Trout thinks it looks like the interior is on fire. He will hate to see the plastic go.

No, it wasn't raining. This is what you see as you drive in at night if the lights are on. Some TV shows would lead you to believe that those globes of light are spirits of some sort. I think they are just a dirty camera lens or maybe some bugs.

So that's it for the last 3 weeks. I will try to update it again next weekend, but don't hold your breath.
 And this is the sofa I picked. It's much more traditional than the Crate & Barrel one and bigger, but I think it will look better and it's definitely more comfortable. It's called the Arcadia and is made by Broyhill, but I couldn't find it online either at Broyhill or at Penney's.
 Since it is bigger, I had to rearrange the great room furniture layout a bit. We still don't have all the pieces we need, like the side tables, but we'll get there. I checked yesterday and so far at least I've spent much less on furniture and decoration than I budgeted.
Speaking of holes, this is the one for the kitchen sink.
And here are the drawer fronts and doors on the island.
This is the floor of the master shower, ungrouted.
This is Trout's vanity with the sink in, but ungrouted.
This shows his light fixtures. A very tall arched mirror will be between them and will cover up the box in the middle.
That's the hot water heater on the left and the water softener on the right. There will also be a recirculating pump that will keep the hot water on the ready for all the baths. I thought this was a bit of an extravagance at first and then read it is actually considered to be an environmentally sound thing down here because you don't have to run the water for a long time before the hot comes through.
Last post I had a picture of the guest bath vanity lights and how odd they looked. They have now all been reversed and they are much better.
And the blessed toilets. They aren't functional yet, but there is hope. This is the one in the guest bath.
And this is the one in the master bath. Please note that they are the same color and the walls are the same color -- but not in these pictures!
This is the one in the shop bath. It is white and is a different brand.
So that's what's new for Week 60 of the project. The next update won't be until September 14th at the earliest. Have a great Labor Day.
